Bundle Dyeing with Maple Leaves
- Sara
- Nov 24, 2018
- 3 min read
I feel the Winter every day now as I wake up to a world made crystalline by glittering frost. The cold time of year is precious to me. It’s the time to insulate, draw inward around the hearth, and hibernate with ideas for the coming warm season.

As we say goodbye to Autumn, I wanted to do a last natural dye post. One of my favorite techniques for using plant dyes is eco-printing or bundle dyeing. In this technique, the plant material is used whole to leave a ‘print’ on the fabric.


Leaves are my go to for this technique, especially since we have such a wide variety of maple leaves here in the Pacific Northwest. Different kinds of maple will give different results, but I often keep my eye out for maples that turn red in the Fall. I’ve found these often give the best dye.

There are still plenty of these lovely red leaves down by the river and in my neighborhood right now. Down by the river, after I asked permission of the trees, I gathered some for this project. I plucked a few dangling from the branches, but mostly picked up leaves from the ground.

When gathering leaves, try and keep them pressed flat. They’re likely to crumble and break or be difficult to use later otherwise. I often gather a large amount of leaves in the Fall and put them in my freezer for use throughout the year. If they’re stored flat in the freezer, it’s much easier to peel them apart for use when you’re ready.


I’ll be bundle dyeing on a tea mat I recently wove from linen and backed with linen fabric. The colors didn’t come out strong enough for my liking in the dye pot, so I’m going to jazz it up a bit with the leaves.
Before starting the bundle dyeing process, I soaked the tea mat in my iron mordant bath for an hour (see this post about iron mordants). The iron will really help bring out the dark silhouettes of the leaves. You can do this process without it, but the ‘leaf-prints’ will be much fainter.

Lay your cloth out flat and position the leaves underside down on the cloth. The underside of the leaf is where all the little cells open for transpiration, and thus this side will open to release color onto the fabric much better.

Now, using a stick or PVC pipe (I used two short sticks here since I didn’t have any PVC pipe long enough), lay it on the edge of the fabric and tightly roll the cloth up just like an empty tube and poster. Take care to press the leaves flat as you go without crimps so you get a nice print of them.


Once rolled up, then take some string (be sure to use white so that no color bleeds onto your fabric) and wind enough to firmly hold the cloth down so that the leaves will be in very close contact with the fabric and properly release their dye. Tightly bind the cloth down around your stick.


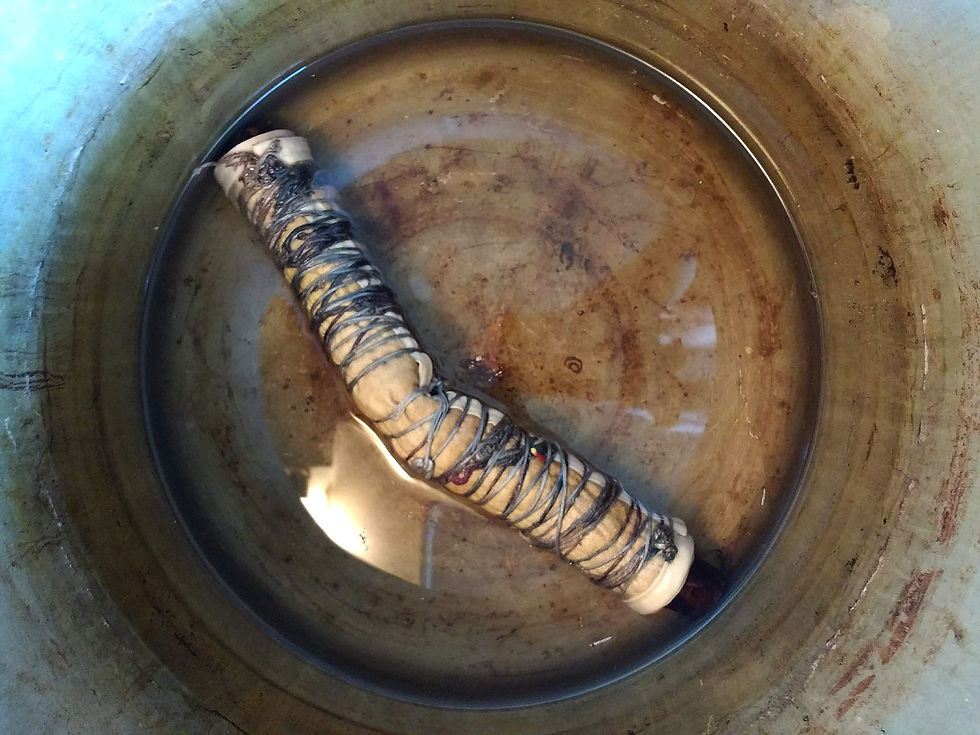
Once tied off, add your bundle to your dye pot. Fill the pot with enough water to just cover the bundle. Bring the pot to a slow boil and give the bundle a 30-60 minute simmer before turning the heat off. Allow the bundle to cool before taking it out.
You can go ahead and open up your bundle at this point and see how well your print came out. I like to wrap my bundle up in plastic and let it sit 2-3 days before unbundling. It gives the plants more time to work their magic.

Once you’ve unwound your bundle and saved your string for later bundles, peel off the leaves and discard them. Then, give your cloth a good hand washing with gentle soap and slightly warm water. Hang it to dry. Once dry, give the cloth a nice ironing. Often the bundle process creates all sorts of crinkles.


Viola! You have a magic piece of fabric with real leaf prints to use in many different projects. I often make tarot bags, tea mats, and silk scarves but the possibilities are endless!


Rose petals, marigold, oak leaves, and eucalyptus are other plants to experiment with using this technique. But, don’t limit yourself! Try out anything you like and let me know how it goes.


Comments